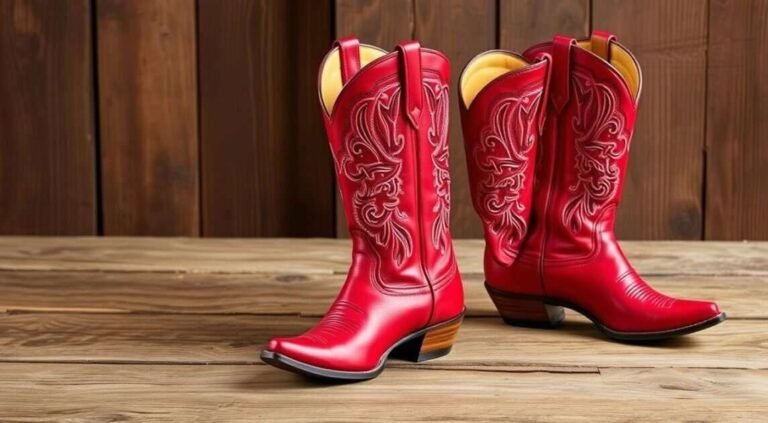

How To Make Big Red Boots: DIY Costume Guide
To make big red boots, build a lightweight foam cover around a pair of comfortable shoes. Use EVA foam, contact cement or hot glue, red paint, and a simple paper pattern. Keep the real shoes as the sole and walking surface. This makes the boots easier to wear, safer to balance in, and less likely to fall apart.
This guide is written for costume makers in the United States. It works well for cosplay, Halloween, comic conventions, theater, school events, and oversized cartoon-style footwear. The finished boots should look large, but they should not make normal walking unsafe.

What You Need to Make Big Red Boots
The easiest method uses an old pair of sneakers as the base. You then build a red foam shell around the shoes. The foam creates the oversized shape, while the sneakers provide support, traction, and a secure fit.
Materials
| Material | Purpose |
|---|---|
| Comfortable sneakers or slip-on shoes | Inner footwear and walking support |
| 6 mm or 10 mm EVA foam | Main boot shell |
| 2 mm EVA foam | Small details and surface strips |
| Paper, poster board, or craft paper | Pattern making |
| Pencil and marker | Drawing and marking |
| Scissors | Cutting paper patterns |
| Sharp craft knife | Cutting EVA foam |
| Hot-glue gun | Fast assembly and small repairs |
| Contact cement | Stronger foam-to-foam bonds |
| Red flexible paint | Coloring the foam |
| Black or red fabric | Covering gaps or making ankle cuffs |
| Elastic straps or hook-and-loop tape | Holding the covers in place |
| Sandpaper or a foam file | Smoothing edges |
| Heat gun or hair dryer | Shaping the foam |
| Ruler and measuring tape | Taking measurements |
| Painter’s tape | Temporary holding and pattern work |
A craft knife, heat gun, and contact cement can cause serious injuries or fumes. Use a cutting mat, eye protection, good airflow, and adult supervision when needed. Follow the safety instructions on each product.
Choose the Right Base Shoes
Choose shoes that already fit well. Sneakers with a flat sole and closed toe are usually the best choice. Avoid loose sandals, very high heels, or worn soles.
The base shoes should have:
- Good tread
- A firm heel
- Enough room for normal movement
- Laces, straps, or another secure closure
- No major cracks in the sole
Do not use the foam shell as the only sole. EVA foam can compress, tear, or become slippery. The real shoe should stay under your foot.
Pick a Boot Size
Measure the length and width of the base shoe. Then decide how much larger you want the costume boot to look.
For a cartoon-style boot, a shell that is about 2 to 4 inches wider than the shoe often creates a clear oversized effect. A shell that is much larger may catch on stairs, door frames, or the other boot.
Measure both boots if your feet are different sizes. Use the larger measurement when making the pattern.
How to Make a Paper Pattern
A paper pattern lets you test the shape before cutting expensive foam. It also helps you make the left and right boots match.
Start with four main pattern pieces:
- Outer side panel
- Inner side panel
- Toe panel
- Heel or back panel
You may also need a top cuff or ankle ring.
Trace the Shoe Shape
Place the shoe on paper and trace around the sole. Add a safety border of about 1 inch around the sides. This border gives the foam shell room to sit outside the shoe.
Do not make the bottom opening so small that the shoe cannot slide inside. The opening should be large enough for the shoe, but not so large that the shoe moves inside the costume boot.
Mark these points on the paper:
- Toe
- Ball of the foot
- Arch
- Heel
- Highest ankle point
- Shoe opening
- Inside and outside edges
Cut out the paper shape and wrap it around the shoe. Tape the edges together for a quick test.
Add Seam Allowance
Add about ⅜ inch to ½ inch around edges that will be joined. This extra foam gives you room to trim and adjust the fit.
Avoid adding seam allowance to every edge automatically. Edges that overlap may need extra material, while edges that meet directly may need a clean, exact cut.
Test the Paper Shell
Tape the paper panels around the shoe. Check the following:
- Can the shoe slide in and out?
- Does the toe have enough space?
- Does the heel stay centered?
- Can you bend your ankle?
- Do the two boots look similar?
- Does the shell touch the floor only where intended?
Walk a few slow steps while wearing the paper test shell. If the paper catches on your other foot, make the lower shape narrower before moving to foam.
How to Cut and Shape the Red Foam
Once the paper pattern fits, transfer it to EVA foam. Use a marker and a ruler to draw each piece. Label every part, such as “left outer,” “right inner,” or “toe.”
Cut foam with a sharp craft knife. Several light passes are safer and cleaner than forcing the blade through in one cut.
Shape the Toe
The toe creates most of the oversized look. To form a rounded toe:
- Cut the toe panel slightly larger than the shoe.
- Warm the foam with a heat gun or hair dryer.
- Bend it over a rounded object, such as a bowl or large ball.
- Hold it in shape until it cools.
- Test it against the shoe.
- Trim only after the curve looks correct.
Keep the heat moving. EVA foam can shrink, warp, or burn if you hold the heat in one place. A heat gun can also burn skin and nearby materials.
Shape the Side Panels
Warm each side panel and curve it around the shoe. The foam does not need to copy every detail of the sneaker. It only needs to create a smooth outer form.
For a cartoon boot, use broad curves instead of many small panels. Fewer seams usually create a cleaner look and reduce the chance of failure.
Create a Wide Ankle
A large ankle opening can make the boot look more dramatic. However, the opening must not let the shoe slide around.
A practical design uses:
- A foam ankle shell
- A fabric or foam cuff
- An elastic strap inside
- An opening at the back for access
The cuff can hide the top edge of the sneaker. It can also cover small gaps between the costume shell and the wearer’s pants.

How to Assemble the Big Red Boot Shell
Dry-fit all foam pieces before using glue. Place the pieces around the shoe and hold them together with painter’s tape. This step shows whether the seams meet and whether the shell stays centered.
Choose the Right Adhesive
Hot glue works well for quick costume work and small parts. It sets fast, but it can create thick bumps and may peel under stress.
Contact cement usually creates a stronger foam-to-foam bond. It needs good ventilation and careful use. Apply it to both surfaces, allow the adhesive to become tacky as directed on the label, and then press the pieces together.
Do not use contact cement in a closed room. Keep it away from flames, sparks, children, and pets. Read the product label before use.
Use This Assembly Order
- Build the toe section.
- Attach the outer side panel.
- Attach the inner side panel.
- Add the heel panel.
- Install the ankle cuff.
- Test the shoe inside the shell.
- Add the attachment straps.
- Trim and seal the seams.
Work on one boot at a time, but compare both boots often. This prevents small differences from becoming large differences at the end.
Add Internal Supports
The foam shell should stay attached to the shoe when you walk. Use one or more of these methods:
- Elastic strap across the shoe opening
- Hook-and-loop strap around the ankle
- Fabric loop around the heel
- Elastic sewn or glued inside the cuff
- A removable insert that holds the sneaker in place
Avoid attaching the shell directly to a shoe that you may want to use later. Straps make the costume easier to repair and remove.
Leave the Sole Clear
Trim the foam so the real shoe sole can touch the floor. You can extend the foam around the sides, but do not cover the tread.
If the foam reaches below the sole, it may catch on the floor. This can cause a trip. It may also absorb water and wear out quickly.

How to Make the Boots Look Smooth and Red
EVA foam often has a slightly textured surface. You can paint it directly, but the texture may still show through.
Smooth the Seams
Use a sharp knife or foam file to level uneven seams. Do not remove too much material near a joint.
For small gaps, use flexible foam filler or a thin strip of 2 mm EVA foam. Let the repair dry fully before painting.
A flexible coating can help create a more even surface. Use a product made for foam costumes, and test it on a scrap first. Some coatings become stiff and may crack when the boot bends.
Apply Flexible Paint
Use flexible acrylic paint or a paint made for EVA foam. Regular wall paint may crack when the shell flexes.
A simple paint process is:
- Clean dust from the foam.
- Apply a thin primer or flexible base coat if needed.
- Let the first layer dry.
- Add two or more thin red coats.
- Allow full drying between coats.
- Add darker red paint in seams if you want more depth.
- Seal the surface only if the sealer remains flexible.
Thin coats are better than one thick coat. Thick paint can stay soft inside, crack at seams, or hide the shape of the foam.
Match the Color
Bright red gives a bold cartoon look. Dark red can make the boot look more like leather. A small amount of black or burgundy in the seams can add depth without covering the main red color.
Paint a sample piece first. Red paint can look different under indoor lights, outdoor light, and camera flash.
How to Add Details and Improve Comfort
Details should support the main shape, not make the boots harder to wear. Add raised strips, cuffs, soles, or decorative panels after the basic shell works.
Add a Decorative Sole
You can make a fake sole from EVA foam, but keep it above the real shoe’s tread. A thin foam strip around the outside edge can make the boot appear thicker.
Do not rely on painted foam for traction. Paint does not replace rubber tread.
Add a Top Cuff
A red fabric cuff can cover the top of the sneaker and make the boot look complete. Use stretch fabric, fleece, or another material that allows ankle movement.
Attach the cuff to the foam with fabric glue, contact cement suitable for the materials, or hidden stitches through a fabric lining. Test the attachment before wearing the boots for a long period.
Add Padding
If the shoe moves inside the shell, add thin foam padding near the heel or sides. Do not pack the shell so tightly that your foot cannot move.
Padding should:
- Keep the shoe centered
- Reduce rubbing
- Leave room for natural foot movement
- Stay away from the walking surface
- Remain removable when possible
Wear the socks you plan to use with the costume while testing the boots. Thick costume socks can change the fit.